
5 Reasons To Sleep With A Silk Hair Wrap
BY GRACE DAY |
Ever wondered why (even when you apply oil and comb your hair right before bed) you wake up with frizz, knots, tangles, and hair that feels ten times drier than it did eight hours before? Cotton bed sheets are the guilty culprit – the rough texture causes friction that weakens your hair follicles (leading to knots and frizz) and absorbs moisture from hair, resulting in dryness and breakage.
For years, people with textured and curly hair have used silk hair wraps to protect their hair while they sleep – the slippery smooth material helps to reduce friction and damage, and will make big, shiny differences to your tresses.
Scroll down to discover why a silk hair wrap is worthy of being the newest addition to your overnight beauty routine.
MAINTAINS YOUR HAIRSTYLE FOR LONGER
If you’ve spent time (or money) perfecting your hairstyle, you want to make it last for as long as possible. Help to keep your blow dry or braids preserved by covering your hair with a wrap at night – the silk causes less friction, so helps to keep shape in place.
YOU CAN WASH YOUR HAIR LESS
Wearing a silk hair wrap encourages the natural oils on your scalp to spread from root to tip, which actually prevents greasy hair (as oil is no longer just concentrated in one place). Keeping your hair off your face and pillow also prevents the oils and product from your face from transferring to hair and causing greasiness, and likewise, prevents oil and product from your hair from getting on your pillow and into pores (where it could potentially cause breakouts).
PREVENTS NEW TANGLES
Tossing and turning on a regular pillow leads to hair easily getting tangled, but (thanks to the lack of friction) sleeping with hair in a silk hair cap will help to prevent knots from forming. Brush your hair before bed to remove any pre-existing knots, then gently twist your hair back from your face and tuck it into the wrap to prevent hair from tangling while you sleep.
CURL PRESERVATION
Natural curls can frizz overnight, meaning you wake up to a tangled mess. Covering your hair with a silk wrap helps to keep the spirals intact and prevents the curls from falling out of shape or breaking up and looking frizzy. It’s important to use real silk too – since many other materials will sap the moisture from curly hair (which is often prone to dryness).
YOU WON’T NEED TO BRUSH OR STYLE YOUR HAIR AS OFTEN
Thanks to the lack of knots, tangles, and frizz, sleeping with a silk hair wrap makes things much less stressful when it comes to managing your hair in the morning. You can shave five minutes off your getting ready time (and consequently gain an extra five in bed!) without having to battle with a brush, comb, heat tools, and styling products every single day.
How To Whiten Underneath Your Nails Naturally!
Whitening underneath your nails might require a little bit of effort. The thing about nails is that they can get discolored easily, either because of excessive use of nail polish or due to being exposed to dirt almost the whole day. To keep your nails looking fresh and clean, you might want to know how to whiten the area underneath your nails naturally.
1. Lemon Juice
A super easy homemade method to whiten the area underneath your nails is to soak your fingers in lemon juice. Squeeze two lemons in a mini bowl, put your fingertips in the bowl for approximately 10 minutes for the juice to sit into the area underneath your nails. Rinse your hands with warm water, then make sure to apply hand/nail cream.
2. Baking Soda
Baking soda is known for its countless beauty benefits. In order to whiten the area underneath your nails naturally, mix two teaspoons of baking soda with warm water and apply the paste on your fingernails while making sure it reaches underneath your nails. Leave it for around 5 minutes and then wash it off.
3. Toothpaste
Another great way is to gently rub your fingertips and underneath your nails with a soft toothbrush that has some toothpaste on it. To whiten the area underneath your nails properly, leave the toothpaste to set it for 3 minutes, then rinse with warm water.
4. White Vinegar
You can also whiten the area underneath your nails using white vinegar. One tablespoon of white vinegar along with a small cup of water, can whiten your nail tips if you just leave your nails soaked in it for 5 minutes. Don’t forget to apply hand and nail cream to keep them moisturized.
5. Soap and Water
Needless to say, cleaning underneath your nails with soap and water is one of the most common ways to whiten the area underneath your nails. In order to achieve the best results, make sure to rub gently underneath your nails with a nail brush while using soap and water.
How To Grow Thicker EyeBrows NATURALLY!
Thick eyebrows have always been in demand. Thick, well-shaped eyebrows can enhance your look, while thin and sparse eyebrows can make you look older and dull.
Many people end up with eyebrows that are too thin because of over plucking, threading or waxing. Sometimes, thin eyebrows occur as a result of the aging process, nutritional deficiencies, poor cosmetic application or medical conditions like hypothyroidism, eczema and alopecia areata.
If your eyebrows are too thin, you can easily solve this problem with the help of some natural home remedies.
1. USDA Certified Organic Castor Oil
Castor oil is one of the most effective remedies to boost the growth of your eyebrows. It contains protein, vitamins, fatty acids and antioxidants that nourish the hair follicles and promote hair growth. Plus, it is helpful in resisting any microorganisms that hamper eyebrow hair growth.
Soak a cotton swab in pure castor oil and apply it on each eyebrow.
Massage gently with your fingertips for 2 to 3 minutes.
Leave it on for at least 30 minutes or overnight.
Wash it off with lukewarm water and a mild cleanser.
Repeat once daily for a few weeks until you notice improvement.
Note: Stop using castor oil if it causes any irritation or burning.
2. USDA Certified Organic Coconut Oil
To enjoy dense and impressive eyebrows, you can use coconut oil. The various proteins as well as nutrients like vitamin E and iron in coconut oil promote healthy and thick eyebrows. It can also help make your eyebrows darker.
Put a few drops of warm coconut oil on your fingertips and apply it on your eyebrows.
Massage gently for a few minutes to boost blood circulation.
Leave it on overnight.
The next morning, rinse it off with warm water.
Do this daily for 1 to 2 months to notice changes in the thickness of your eyebrows.
3. USDA Certified Organic Olive Oil
Olive oil is also good for your eyebrows. Being rich in vitamin E, olive oil can help your eyebrow hair grow faster and thicker. It will also help keep it dark-hued.
4. USDA Certified Organic Onion Juice
Onion juice also aids faster and denser growth of eyebrow hair. The juice has sulfur that improves the production of collagen tissues required for proper eyebrow growth. Also, it strengthens the hair follicles.
Grind 1 small onion and extract the juice.
Massage this juice into the eyebrows for about 5 minutes.
Allow it to dry on its own and then wash it off with a mild cleanser and cold water.
Follow this treatment once daily for several weeks.
5. USDA Certified Organic Egg Yolk
The hair of the eyebrows is made up of keratin protein, and egg is a great source of protein. Thus, it can help improve the health of your hair, which in turn will make your eyebrows thick.
Break 1 egg and separate the yolk from the white part.
Beat the yolk until you get a thick, creamy consistency.
Apply it on each of your brows with a cotton swab.
Leave it on for 15 to 20 minutes and then wash it off with cold water.
Use this protein treatment once or twice a week until you are satisfied with the result.
6. Fenugreek Seeds
Fenugreek seeds can also help grow thick eyebrows. They are rich in protein as well as nicotinic acid and lecithin that promote hair growth. The seeds also help in rebuilding hair follicles.
Soak 1 teaspoon of fenugreek seeds in water for at least 5 hours.
Grind the soaked seeds into a thick paste, then add a little coconut oil or almond oil.
Apply the paste on the brows just before going to bed.
Leave it on overnight.
Wash it off in the morning with warm water.
Follow this remedy 2 or 3 times a week for 2 months.
7. USDA Certified Organic Aloe Vera
Aloe vera has enzymes and moisturizing properties that nourish hair follicles and make your eyebrows grow faster and thicker. It can even make the skin near your eyebrows very soft.
Extract the gel from an aloe vera leaf. Gently massage it over your eyebrows. Allow it to sit for 30 minutes before rinsing it off with lukewarm water.
Another option is to prepare a paste with 1/2 teaspoon of aloe vera gel and a little honey or coconut oil. Apply it to your eyebrows. Leave it on for 30 minutes and then rinse it off with water.
Follow either of these remedies once daily for several weeks for best results.
8. USDA Certified Organic Lemon
Lemon can also be useful for enhancing your beauty by making your eyebrows grow thicker. Being rich in vitamins C and B, folic acid and other nutrients, lemon can promote the growth of eyebrow hair.
Simply rub a slice of lemon over your eyebrows. Leave the juice on for 15 to 20 minutes and then rinse it off with warm water.
Alternatively, put the sliced peels of 1 lemon into 1/4 cup of coconut oil. Allow the solution to sit for at least 15 days in a cool, dry place. Once ready, apply it on your eyebrows using a cotton ball every night before going to bed. Wash it off the next morning.
Follow either of these remedies once daily to enhance your eyebrows.
9. USDA Certified Organic Milk
You can also use milk to grow your eyebrows thicker. Milk contains protein as well as other nutrients that nourish hair roots and improve hair growth.
Put a small amount of whole milk in a bowl.
Dip a cotton ball into it and gently rub it on your eyebrows.
Allow it to dry on its own and then rinse it off with warm water.
Follow this remedy whenever possible to get the desired result.
10. Eat Healthy
A good diet is essential to enjoy thick eyebrows. It will give your body the nutrients required for faster hair growth.
Eat foods high in vitamin A like red pepper, sweet potatoes and carrots.
Eat foods high in vitamin C like lemons, peppers, broccoli, papayas and oranges.
Eat foods high in vitamin E like almonds, peanuts, basil, spinach and olives.
Eat foods rich in protein like cheese, tofu, beans, lentils and yogurt.
Eat foods rich in omega-3 fatty acids like avocados, walnuts, olive oil and salmon.
Eat foods rich in iron like milk, fish, green vegetables and lean cuts of meat.
If required, take a multi-vitamin or other supplements. Also, be sure to use or eat USDA certified organic produce whenever possible.
5 Ways To Obtain More Beautiful Lashes!
Long, healthy lashes are a girl’s dream, but how exactly do you go about getting them without permanent lash extensions or serums with crazy side effects?
Well, there are several different ways that you can be taking care of your lashes to help them grow naturally, as well as special ways you can be applying products to give the illusion of lengthier lashes, at the very least.
By slightly altering your beauty routine, you can be well on your way to having the voluminous lashes you’ve always wanted.
1. Moisturize
Using certain oils, such as USDA certified organic jojoba oil, you can naturally moisturize your lash line to keep the hairs healthy and reduce breakage.
2. Brush
Using a spoolie brush, gently brushing your lashes can keep them growing straight instead of turning in different directions as they grow. It can also increase lash health and help them grow longer than they normally would.
3. Use The Right Mascara
Certain mascara’s are known to have a more lengthening effect.. There are plenty of mascaras out there to give you the lash look you’re going for.
4. Apply & Remove Mascara Correctly
Removing your mascara on a nightly basis is key in making your lashes less brittle. Doing so in a downward motion will keep you from damaging or removing any hairs from your lash line.
Once your lashes are clean, you can curl your lashes before ever applying mascara to help make them look longer. Applying mascara in a slight sideways motion will help make your lashes look thicker.
5. Change Mascara Frequently
Using fresh mascara will allow for easier application, so it’s important to never let your mascara dry out. It’s recommended to purchase new mascara every three months.
Do You Want Whiter Eyeballs?
Every woman knows it's important to keep her eyes as beautiful, as youthful, and as "soulful" as they can be. Eyes don’t need a lot of diet control or heavy workouts. They’re actually pretty low-maintenance, generally. Simple upkeep every now and then ensures they’ll remain healthy year after year.
How Eyes Change With Age
Eyes start undergoing major changes in mid-life. Most of these are changes in the way the eye functions — for example, color perception changes, shrinking field of vision, and the like. Some changes are outwardly visible — drooping lower eyelid, eyes ‘sinking’ into the head, and the sclera (the whites of the eyes) turning a more yellowish color.
The White Of Your Eyes - Sclera
A clear, milky-white sclera is often linked with health and beauty. It’s usually the first part of the eyes to show signs of aging. The sclera adopts a slight yellow or brown hue with age. Studies reveal that this hue actually has more to do with environment than with age. Long-term exposure to ultraviolet rays, dust and wind causes this change. One thing you can do is invest in a wide-brimmed hat that goes along with your sunglasses to block those rays from constantly entering your eyes. Diet also has a significant influence on the health of your eyes.
Food For Whiter Eyes
Nutrition is very important when it comes to eyes. The five nutrient categories that you must include in your regular diet for healthier eyes are:
Vitamin A - Remember how your mother insisted that you finish your carrots? Well she had a reason and she was right. USDA certified organic Fruits and vegetables high in Vitamin A or beta carotene are a must food for your eyes. Fill up your fridge with carrots, peaches, papaya and mangoes.
Vitamin C - Vitamin C foods include oranges, grapefruits and strawberries.
Vitamin E - Vitamin E can be provided to the body by regular intake of sunflower seeds, wheat germ, hazelnut, peanut butter and almonds. One handful (an ounce) of almonds will provide half of your daily dose of Vitamin E.
Antioxidants - Leafy greens are good sources of lutein and zeaxanthin, antioxidants responsible for lowering risks of developing macular degeneration and cataracts. That means eating kale, spinach, collards and romaine lettuce can never be too much.
Zinc - There are many excellent sources of zinc for the raw vegan, including sesame seeds/tahini, hemp seeds, cashew and pine nuts, shiitake mushrooms and avocados. An easy rule to remember is if the fruit and vegetables are yellow and orange, they are excellent for your eyes.
Courtesy of Beautiful on Raw
10 Ways To Hydrate Your Skin!
The weather, harsh soaps and cleansers, and simply having your bath or shower water too hot, can all add up to dry skin. You can, of course, combat dry skin with expensive moisturisers and body lotions, but why not hydrate your skin the natural way? Here are ten genius ways that you can hydrate your skin naturally.
1. Drink plenty of water
You’ve probably heard this one before, but it still has to get a mention on our list. The easiest way to hydrate your skin is to keep your body hydrated from the inside. It’s also good for your heart and your kidneys, so make sure you are getting your two liters of water a day.
2. USDA certified organic Olive oil
Olive oil is brimming with the fatty acids and antioxidants that will help keep your skin hydrated and healthy. Try massaging some olive oil into your skin, before you shower or bath, and it will help to stop the warm water and soap drying your skin out.
3. Use only gentle, organic soap
Check the labels on your soaps and cleanser too. Avoid the chemical laden, harsh soaps, which will strip the natural oils from your skin, and chose those that contain only natural ingredients and moisturising agents like aloe vera instead.
4. Turn down the temperature on your baths and showers
Hot water will also strip the oils from your skin, so don’t spend too long in scalding hot showers or baths. The hot water might feel lovely and relaxing, but it’s not going to help you keep your skin hydrated at all.
5. Add avocado to your diet
What you eat will also affect the hydration of your skin. If you don’t already eat avocado, then try adding it to your diet. USDA certified organic Avocado contains lots of healthy fats that will help hydrate your skin, but dunk bad cholesterol. Avocado makes an amazing natural hydrating face mask too; just mash up some avocado flesh in a bowl, add a teaspoon of avocado oil and apply to your face for five minutes before washing off with lukewarm water; it’s a wonderful, refreshing and nourishing face mask that is not only very easy to make, but is also very effective.
6. Use a humidifier
Putting a humidifier in your bedroom will also help to stop your skin from drying out. It will also help you sleep better and it’s good for your respiratory system too. Also, don’t have the central heating or the air conditioning on too high, as both these can dry out your skin.
7. Wonderful Honey
One of the best skin care products that Mother Nature gave us is raw, USDA certified organic honey. It’s naturally hydrating and it also has anti-bacterial and anti-fungal properties that will soothe irritation and fight infection. Apply honey to any particularly bad areas of dry skin and leave it on for about five minutes, before washing off again with lukewarm water. Repeat this daily, for a few days, and you will soon see the difference in your skin.
8. Eat more pumpkin
Another superb food for hydrating your skin, from the inside, is pumpkin. Just by adding a small amount of pumpkin to your diet, you will be supplying your skin with more of the nourishment it needs to stay healthy and hydrated.
9. Eat more fruit
Most fruit has high water content and it also has the vitamins and minerals that you and your skin need to stay healthy as well. Replace one of your current daily snacks with a piece of fresh fruit and your skin will look and feel a lot better for it.
10. Increase your omega-3 fatty acids
Omega-3 fatty acids provide the building blocks that your body uses to produce the oils on your skin. Add more salmon and oily fish to your diet and you’ll be doing your heart a favour, as well as improving the hydration of your skin.
Caution:
Always treat your skin kindly. Avoid harsh rubbing and scrubbing, it will help you delay aging and stay younger for longer. Also, make sure you are not allergic to natural ingredients of face masks and treatments, test them on your wrist before using on your face.
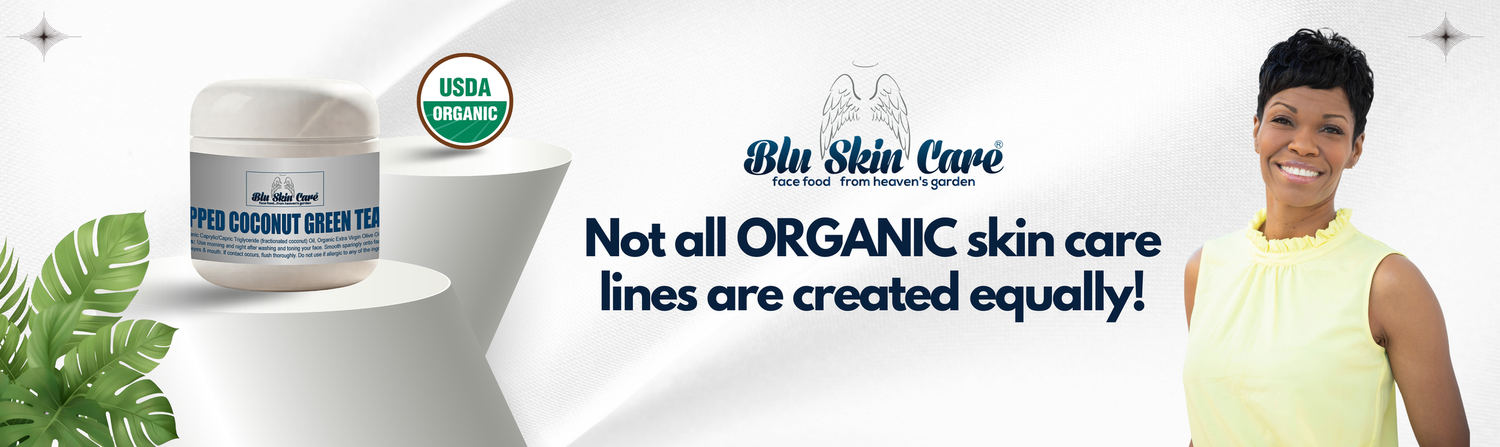
How to hydrate your skin naturally? Try using our USDA certified organic Whipped Coconut Green Tea Moisturizer.
6 Ways To Get Rid Of Dark Spots!
1. Lemon Juice
If you want to go the natural route or your dark spots are fairly mild, USDA Certified Organic lemon juice is a natural skin brightener and toner. Simply squeeze it through a strainer, and use a tissue to dab it on your dark spots.
2. Vitamin E Oil
USDA Certified Organic Vitamin E oil has a wide range of skin benefits. Because it stabilizes collagen production, it also works to even out hyperpigmentation. Apply a small amount daily until you achieve the desired results. This particular ingredient has also been proven to be helpful in soothing eczema.
3. Castor Oil
Organic Castor oil is another effective and simple dark spot remedy. You can use it along with Vitamin E or by itself, applying it twice a day.
4. Buttermilk
It may come as a surprise to you, but buttermilk is actually a powerful remedy for dark spots. Used since ancient times, it contains a large amount of lactic acid, which is commonly used to treat skin discoloration. Apply it to your skin twice daily.
5. Vitamin C
Topical Vitamin C works impressively well to lighten dark spots, general hyperpigmentation, and freckles. Use a Vitamin C serum or gel, or opt for skincare products that contain Vitamin C so that you receive its skin-healing benefits.
6. Water
Believe it or not, one of the easiest ways that you can combat dark spots is by increasing your water consumption. Aim for at least six to eight glasses of water a day. Water removes harmful toxins from your body, which results in clearer, healthier skin.
Three Ways To Get Rid Of Under-Eye Bags!
Drink plenty of water.
Under-eye bags are often caused by the retention of water due to high salt concentration in the area. You might wake up with bags after eating a salty dinner or crying. Whether it's from tears or food, salt can draw water to your face and cause it to collect under your eyes.
Flush excess salt from your system by drinking water. Avoid salty foods for the rest of the day.
Make sure to stay away from drinks that cause you to become dehydrated, like coffee and alcohol.
2. Soothe your eyes with something cold.
You've probably heard that placing cucumbers over your eyes will help reduce bags, but it's actually the cool temperature that soothes the area. Cucumbers happen to be the perfect shape, size and texture to treat under-eye bags, so go ahead and slice one up - just make sure it's been chilling in the refrigerator beforehand.
If you don't have a cucumber, wet a few teabags and chill them in the freezer or refrigerator before placing them over your eyes. Use a soothing tea, like chamomile or peppermint, so you get the benefits of aromatherapy at the same time.
Cold spoons will also work. Leave 2 spoons in the freezer overnight, and place them on your eyes for 10-15 minutes.
3. Put on some concealer.
In the short term, concealing under-eye bags and circles with a little makeup is the quickest and most effective solution. The right makeup can greatly reduce the appearance of bags and keep you looking fresh all day. Follow these steps to apply concealing makeup:
Choose a concealer that matches your skin tone. If your under-eye bags are dark, you could also go one shade lighter. Apply the concealer with your finger or a cotton ball. Make sure you dab it on lightly instead of rubbing it into your skin. The makeup will conceal your bags more effectively if it stays on the surface of your skin.
Follow the concealer with a brush of powder to help it set and stay in place all day. Use a matte powder (not one with shimmer) and a blush brush to apply a tiny bit of powder under your eyes.
10 Ways To Get Rid Of Pimples!
1. Ice
Ice can be used to quickly reduce the redness, swelling and inflammation of pimples. It helps in improving blood circulation to the affected area, and in tightening skin pores and removing dirt and oil accumulated on the skin. You can use ice cubes or crushed ice, whichever is convenient.
2. Lemon
Another quick way to get rid of pimples is the use of lemon juice, which is rich in vitamin C. Lemon juice helps pimples dry up faster. Be sure to use fresh lemon juice and not bottled juice, which has preservatives. There are a couple of ways to apply this remedy.
Dip a clean cotton swab in fresh lemon juice and apply it to the pimples before going to bed.
You can also mix one tablespoon of lemon juice with one teaspoon of cinnamon powder and put it on the pimples overnight. In the morning, wash the skin well with lukewarm water. However, this particular remedy is not suitable for those with sensitive skin.
3. Tea Tree Oil
Tea tree oil is excellent for treating acne and pimples. It has antibacterial properties that help fight the bacteria that cause these skin problems.
4. Toothpaste
The toothpaste that you use every morning to clean your teeth also can be used to treat pimples quickly. It is most effective when used following the ice remedy. You must use white toothpaste; avoid using gel toothpaste.
5. Steam
Steaming is wonderful for your skin at any time, but particularly when you have pimples. The stem will open your pores and allow your skin to breath. This helps get rid of oils, dirt and bacteria trapped in the pores that can cause infection or inflammation.
Fill a large container with hot water and allow the steam to come in contact with your face for a few minutes.
Rinse your face with lukewarm water and, after drying, apply an oil-free moisturizer.
6. Garlic
Garlic is an antiviral, antifungal, antiseptic and antioxidant agent that can help in the fast treatment of pimples. The sulfur in garlic also promotes quick healing of pimples.
Cut a fresh garlic clove into two pieces.
Rub the garlic on the pimples and leave it for five minutes before washing the skin with lukewarm water.
Repeat the treatment several times a day.
Eating one raw garlic clove daily can also help purify your blood. But do not to eat too much raw garlic as it can upset the stomach.
7. Baking Soda
Baking soda is another effective home remedy to get rid of pimples because it helps exfoliate the skin to remove excess oil, dirt and dead skin cells.
Make a thick paste by mixing one teaspoon of baking soda with some water or lemon juice.
Wash your skin well, leaving it slightly damp. Apply the paste on the affected areas and allow it to dry for a few minutes. Never keep baking soda on your skin for longer than a few minutes as it can cause dryness or irritation.
Wash your face with warm water.
Repeat the process twice a day for quick results.
8. Honey
Honey is a source of natural antibiotics that can speed up the healing process, as well as help prevent infections.
Dip a clean cotton swab in honey, put it directly on the affected area and leave it on for half an hour.
Wash the skin well with lukewarm water.
Do this a few times a day.
Another option is to mix honey and cinnamon together to make a paste and applying it over the pimples before going to bed. In the morning, there will be less inflammation or swelling. Wash the skin well with cold water.
9. Cucumber
Cucumber is a rich source of potassium and vitamins such as A, C and E. It also has a cooling and soothing effect on the skin.
Cut one or two fresh cucumbers into pieces and soak them in water for about an hour. The nutrients, such as vitamin A, potassium and chlorophyll will transfer to the water.
Strain the water and drink it, or use the water to wash your face.
You can also make a face mask by grinding one cucumber. Apply the mask on your face and allow it to dry for 15 minutes. Wash your skin with warm water. This will help clean dirt and bacteria from your pores.
10. Papaya
Papaya fruit has a number of properties that help in the treatment of pimples. It is a good source of the antioxidant vitamin A, and it has enzymes that help reduce inflammation and make your skin soft and smooth.
Crush raw papaya pieces to extract its juice and apply it over the pimples. Leave it on for 10 to 15 minutes before rinsing it off.
To make an exfoliating face mask, mash some papaya pieces and add a little honey. Apply this paste on your face and massage gently. Leave it on until it dries completely and then rinse it off.
Tricks To Growing Longer Eyelashes!
Long eyelashes add an extra point to your overall look. They make your eyes look prettier as well as they highlight your eye makeup. Every girl desires to have long eyelashes to enhance their beauty. You might be tired of using extra layers of mascara to increase the volume of your eyelashes.
No worries, because here is one natural way to grow long and thick eyelashes.
JOJOBA OIL TO THE RESCUE!
USDA certified organic Jojoba Oil offers powerful moisturizing and regenerative properties. it can be used a variety of different ways including eyelash enhancement. it became very popular in the 1970s replacing sperm whale oil as a key ingredient in most cosmetic products like creams, shampoos and sunscreen.
One of its main features is its non-oxidizing property even when exposed to high temperature or pressure. Jojoba oil is one of the best eyelash enhancers because it moisturizes and protects the hair follicles allowing the eyelashes to grow longer and thicker before falling off.
So, the next time you shop, be sure to add organic Jojoba oil to your list.
Do-It-Yourself Beauty Treatment!
Bedtime Piña Colada Callus Treatment
Calluses, those thickened patches of dead skin that form on your heels and toes, generally worsen during summer and winter months, when skin is extra-dry. If left unattended, you may develop fissures: extremely painful cracks in the skin - particularly on the backs of your heels - that may bleed and become infected.
Don't let calluses reach this point. You'll need to soak your feet, reduce hardened skin with a natural pumice stone and moisturize to rehydrate thirsty tissue.
Ingredients
1 foot bath (use a large, clean bucket if you don't own one)
2 to 3 cups organic pineapple juice
½ cup organic coconut milk
1 natural pumice stone
1 organic cotton bath towel
Your favorite organic moisturizer for extra-dry skin
A pair of organic cotton socks
Directions
Add the pineapple juice to the foot bath. Pineapple contains a natural enzyme called bromelain, which breaks down hardened skin.
Add the coconut milk and stir well.
Soak your feet for approximately 8-10 minutes. Rinse well with warm water.
Apply the pumice stone to calloused areas and rub gently. Don't overdo it! You don't want to irritate or remove too much tender skin.
Towel dry. Apply your favorite organic moisturizer while feet are still damp.
Put on your organic cotton socks and wear them through the night, as you sleep. You'll awaken with much softer feet!
Note: If you have severe calluses or heel fissures, you may need to see a podiatrist so he can excise the tough layers of skin. Never attempt "bathroom surgery" - cutting skin with a beauty-store blade or other sharp instrument. You risk injuring yourself and invite infection. Also avoid open-backed shoes (flip flops, sandals or pumps), which slap against the heels and create friction.
Barbara Feiner-Contributor
10 Tips For Healthy Winter Skin!
1. Invest in a Humidifier
Using a humidifier in your home or office will add moisture to dry winter air and help keep your skin hydrated. Run a humidifier in the rooms in which you spend most of your time.
2. Lower the Thermostat
When it's cold outside, we normally want to turn up the heat. But forced or central heat can make the air in your house even drier. Try setting the thermostat at a cool yet comfortable setting — 68°F to 72°F. This will help maintain healthy skin.
3. Limit Shower Time and Temperature
It may be tempting to take a long, steamy shower, but your skin will be much better-served with a 5 or 10 minute shower (or bath), as the AAD suggests. You should also avoid using excessively hot water when washing your hands.
Washing your hands in cooler water appears to be as effective at removing germs as warm water and is less irritating to skin, according to the Centers for Disease Control and Prevention (CDC). And if you're using a restroom air hand-dryer, use it just until your hands are damp rather than perfectly dry.
4. Opt for Gentle, Fragrance-Free Cleansers
The wrong soap can worsen itchy, dry skin. Instead, opt for a fragrance-free, moisturizing cleanser or gel. You can also prevent winter skin problems by using less soap overall, so limit your lathering to necessary areas, such as your hands, armpits, genitals, and feet.
5. Modify Your Facial Skin-Care Regimen for the Season
During the winter months, choose USDA certified organic cleansers, and apply toners and astringents sparingly, if at all. Many astringents contain alcohol, which can further dry your skin. When your skin is dry and itchy, the AAD recommends you stop using products that contain alcohol and fragrances in order to help skin retain its natural oils. At night, use a richer moisturizer on your face. You can try our USDA certified organic Whipped Coconut Green Tea Moisturizer. It’s made with green tea and coconut oil which are great for moisturizing the skin.
6. Moisturize Frequently, Especially Your Hands
Maintain healthy skin by moisturizing after washing up. "It's best to use a cream or ointment in the winter. Lotions are better in warmer, humid climates. And don't forget your hands,” says Dr. Stein Gold. Hand-washing, as the CDC notes, is vital, especially during cold and flu season. But, as Stein Gold points out, "constant washing will cause the hands to take a beating.”
Applying a hand cream after each washing can help, Stein Gold adds. She also recommends wearing waterproof gloves when washing dishes or cleaning around the house.
7. Apply Sunscreen — Even on Gray Winter Days
On bright winter days, snow reflects the sun’s rays — up to 80 percent, according to the Skin Cancer Foundation — increasing your risk of exposure. That means whether you’re out on the slopes, playing in the snow, or just walking through a parking lot on an errand run, it’s just as important to be applying sunscreen in the harsh winter weather as it is in the summer.
8. Wear Appropriate, Comfortable, Nonirritating Clothing
Many cold-weather fabrics can aggravate dry winter skin. "Keep wool and rough clothing from directly touching your skin," Stein Gold says. "This can cause dry skin to get irritated and itchy."
Instead, wear light layers made from soft, breathable materials directly against your skin, and then pull on your heavier, warmer sweaters. Be sure to protect your hands from cold winter air with gloves or mittens, remembering to choose a pair that won’t irritate your skin. If you prefer wool gloves, put on cotton or silk glove liners first.
9. Remember to Eat Right and Stay Hydrated
Sometimes when skin is very dry, it can be helped by foods or supplements that contain omega-3 or omega-6 fatty acids, such as fish oil and flaxseed oil.
10. Change Out of Wet Clothes Quickly to Avoid Itchy Skin
Wearing wet clothes and shoes can further irritate your skin and cause itchiness. If gloves, socks, and pants become wet, be sure to remove them as soon as possible.
EASY TIPS FOR SOFT, SMOOTH, KISSABLE LIPS
The skin that covers your lips can be tough to care for since it’s some of the thinnest skin found on your body.
While certain parts of your face—like your cheeks—have as many as 16 layers of skin, your lips only have four or five layers. That’s why things like smokers lines are so quick to happen.
But there’s good news! Here’s a list of super easy treatments so you can have gorgeous lips all the time.
1) KEEP YOUR LIPS MOIST
Seems like a no-brainer, right? Of course it’s important to keep your lips moist! The question is: how?
Start with the basics! Use organic lip balm frequently throughout the day.
2) CHOOSE A LIP BALM WITH SPF
Imagine the worst case of chapped lips you’ve ever had, and multiply that by ten. It’s that bad.
So what’s the solution? Choose a lip balm with SPF! This will prevent the sun’s UV rays from damaging your delicate lips, which keeps them soft and smooth.
3) WEAR THE RIGHT LIPSTICK
Not all lipsticks are created equal. Some of them contain ingredients that can be harmful, like parabens, for example.
On the other hand, some lipsticks are made from natural ingredients—like plant oils or beeswax—and use natural coloring. If possible, go with one of these lipsticks.
You can also try to find a lipstick that contains vitamins or other moisturizing ingredients. This will keep your lips soft and moist while also providing the color you’re craving.
4) USE LIP PRODUCTS WITHOUT ADDED FLAVORS AND FRAGRANCES
Flavors and fragrances seem wonderful but may actually damage your skin. This includes lip balms and lipsticks with flavor or fragrance.
The ingredients used to give lip products their delicious fragrances and flavors are often chemical-based ingredients that might irritate and dry out your lips. It’s best to avoid them altogether. Try using USDA certified organic or organic at all times.
5) AVOID BITING AND LICKING YOUR LIPS
To achieve soft, kissable lips, you need to be gentle! This means no biting or licking your lips. Biting causes damage (for obvious reasons), while licking your lips can actually remove moisture and dry your lips out.
5 Makeup Tips That Yo Momma Never Told You About!
1.) Disguising Under Eye Bags
Most of us tend to just sweep a layer of concealer to the entire under eye area, but to really conceal bags, it’s best to highlight the crease and then apply a darker shade to the actual puffy area.
2.) Eye Highlights
The placement of highlights is very important when trying to create naturally beautiful eye makeup. Your lighter colors (whites, creams, and pearls) should be applied to the inner corners, the middle of the eye, and just under your brow bone. Apply your lightest colors first, and then move on to your darker shades.
3.) How To Fix Clumpy Mascara
To help prevent this, don’t pump your mascara trying to get more on your wand; you’re basically pumping air into the tube causing it to dry out even faster.
If you are unable to replace your mascara every 3 to 4 months, here’s a quick fix. Add a drop or two of Visine (or any brand of eye drops) into the tube, and then rub the wand around inside. The Visine softens the mascara liquid, making it apply as if it were a brand new tube!
4.) Lipstick Ready
Use a baby toothbrush to exfoliate your lips and get rid of flakey skin that is only accentuated by lipstick. To really get the job done, you can make a homemade lip exfoliate with sugar, honey and coconut oil, or easier but not as effective, cover your lips in lip balm or petroleum jelly before scrubbing.
5.) Make The Best Of Your Eye Shape
As important as your color choices are, the placement of your shadows and liners is just as critical– you can create just about any illusion that you want! With careful placement, you can make your eyes appear wider, closer set, more prominent, deeper set, etc. Determine what shape of eyes you have, and then accentuate them accordingly.
Fall 2018/2019 Makeup Trends! Always use USDA certified organic products when possible!
#1. Peachy Pink Blush
Forget the deep bronze of the summer, girls – the fall 2018 makeup trends are all about peachey taupe shades. In keeping with the natural mood of the season, designers gently warmed up models’ faces with earthy tones.
#2. Low-Key Contour
After too many all-nighters, bold contouring was finally put to bed for the fall/ winter 2018-2019 makeup trends. With one key exception. Barely perceptible and endlessly strategic, contour appeared in its most subtlest manifestation on the runways.
#3. Pale Foundation
Fair-skinned beauties go through a bit of a beating in the summer months. In their quest for the perfect glow they end up in one of two camps: hopelessly toasted or self-tan streaked beyond recognition.
The fall 2018 makeup trends offer solace for these gals. This season, models embraced their natural skin tones, with pale and beige shades of foundation cropping up on all the major shows
#4. No-Makeup Makeup
Minimalists unite! Barely there, or not-there-at-all makeup is back with a force this season. The no-makeup look is about as easy as you can get when it comes to beauty. Simply shower, moisturize, and head out the door.
#5. Black Eyeliner
Since the days of Cleopatra black eyeliner, or kohl, if you will, has been as consistent a go-to as you can get in the beauty world. Black eyeliner is the red lipstick of the peepers and for good reason.
by Emma Kansiz
Secrets To Sweat-Proofing Your Summer Makeup!
1. Start with the proper base.
The way you care for your skin is just as important as the makeup you apply to it. "Use an oil-free moisturizer in the morning," says celebrity makeup artist Fiona Stiles, adding that you should opt for an oil-free foundation formula to match.
2. Invest in a primer.
You won't regret the few seconds it takes to apply a primer, which goes on after moisturizer but before face makeup. "Primers are definitely the way to go in summer," says New York City-based makeup artist Ashunta Sheriff. "They don't feel at all like a heavy, additional layer, and they really help hold makeup in place."
3. Bronze believably.
"Bronzer makes your eyes look brighter, your teeth whiter — everyone looks better with a little warmth added to their skin," says New York City-based makeup artist Troy Surratt. To keep the results looking fresh and natural, he recommends applying bronzer just to the high points of your face, where the sun naturally hits you: forehead, cheekbones, chin, and nose. (Covering every nook and cranny is what gives you that fake, baked look) Powder bronzers are the easiest to apply; look for one with varying shades — they'll blend together for the most authentic-looking results. You can also sweep a little bronzer onto your neck and earlobes, especially if you have short hair or are wearing a ponytail.
4. Keep things light.
If you want to keep your makeup from creasing and caking, say it with us: Less is more. "If you can, just use a tinted moisturizer and a concealer where you need it," says Stiles. "Makeup likes to move around when it's hot, so the best way to avoid that is to wear less of it."
5. Skip the shimmer.
Everyone loves a nice glow, but there's a big difference between a healthy radiance and an over-the-top shine. "Avoid cream foundations or anything too luminous, as the humidity will make you extra shiny and sweaty-looking if you have too much sparkle on your skin," warns Stiles. And as always, be sure to use USDA Certified Organic Skin Care Products before applying your makeup.
Summer Is Here! Ways to stay beautiful in the heat!
Fix your face.
Drink plenty of water to clear up your skin and aid your kidneys in excreting toxins from your body. If your acne is severe, see a dermatologist. If your acne is mild and sporadic, use a concealer when you get spots. Remember, pat in the concealer. Find out what skin type you have, and buy USDA Certified Organic facial cleansers for your specific skin type. Always remove make-up at the end of the day, and wash your face twice (morning and night). Use a good USDA Certified Organic moisturizer so your skin is hydrated.
- You can squeeze some fresh USDA Certified Organic lemon juice onto your fingertips and apply it to any spots you may have on your face. Wash your face twice a day. In the morning, splash your face with cold water for about 10 seconds. Then pat dry with a washcloth or facial sponge. This helps stimulate blood flow and is really good for the skin.
Don't forget the hands and feet.
Since your feet will be exposed a lot from wearing sandals, make sure they're cleaned up. You can have a pedicure done, or give yourself one. Just make sure your feet are clean, hair-free, nails aren't too long, nails are filed, and your feet are moisturized. Be sure to use sunscreen on your feet, too. As for your hands, try putting a clear polish on your nails and keeping them well groomed. If your hands tend to be dry, apply a USDA Certified Organic moisturizer at night and wear white cotton gloves while you sleep (this also works well in the winter). You will wake up with softer, more beautiful hands.
Remain physically active. Go to the gym 3 to 4 times a week. If gym is not accessible, go swimming, biking, rollerblading, walking, etc.
- Wash and dry your hair regularly. French braid your hair on both sides of your head before bedtime, then remove the braids in the morning and you'll have instant waves. It's so quick and easy!
Apply make-up. Use a mascara that is waterproof, which is best for summer and it's likely that you'll be sweating, swimming, etc. Curl your eyelashes before you use mascara, it will make your eyes pop. Apply bronzer to your cheeks, forehead, nose and chin; this will give you a nice summer glow. If you have pimples, dot on concealer and seal it with powder.
5 Makeup Tips Nobody Told You About!
1.) Disguising Under Eye Bags
Most of us tend to just sweep a layer of concealer to the entire under eye area, but to really conceal bags, it’s best to highlight the crease and then apply a darker shade to the actual puffy area.
2.) Eye Highlights
The placement of highlights is very important when trying to create naturally beautiful eye makeup. Your lighter colors (whites, creams, and pearls) should be applied to the inner corners, the middle of the eye, and just under your brow bone. Apply your lightest colors first, and then move on to your darker shades.
3.) How To Fix Clumpy Mascara
Let’s face it, this happens to every tube of mascara over time. The problem is it dries out and then starts to form unattractive lumps. To help prevent this, don’t pump your mascara trying to get more on your wand; you’re basically pumping air into the tube causing it to dry out even faster.
Although mascara should be replaced every 3 to 4 months, I used to replace mine much sooner just because it dries out so fast and creates undesirable results. But, there’s an easy fix for that! Add a drop or two of Visine (or any brand of eye drops) into the tube, and then rub the wand around inside. The Visine softens the mascara liquid, making it apply as if it were a brand new tube!
4.) Lipstick Ready
Use a baby toothbrush to exfoliate your lips and get rid of flakey skin that is only accentuated by lipstick. To really get the job done, you can make a homemade lip exfoliate with sugar, honey and coconut oil, or easier but not as effective, cover your lips in lip balm or petroleum jelly before scrubbing.
5.) Make The Best Of Your Eye Shape
As important as your color choices are, the placement of your shadows and liners is just as critical– you can create just about any illusion that you want! With careful placement, you can make your eyes appear wider, closer set, more prominent, deeper set, etc. Determine what shape of eyes you have, and then accentuate them accordingly.
Be sure to always use USDA Certified Organic Skin Care products BEFORE applying makeup.
Courtesy of http://www.listotic.com/32-makeup-tips-that-nobody-told-you-about/8/
Simple Makeup Tips For Flawless Skin!
Apply Primer
After you moisturize, spread on a light primer with silica, which has a filling effect. A foundation that's creamy and moisturizing won't settle into fine lines and wrinkles, but use it sparingly—the more you add, the more pronounced lines will look.
Pick Foundation Wisely
Choose a liquid foundation with silicone. Avoid luminous or matte ones (they make the skin appear either too moist or too flat to be natural), and instead look for the words "lightweight," "sheer," or "invisible."
Find Your Shade
To find a foundation that matches your complexion, test the color on your neck. Your skin tone is more uniform there than it is on your face, so you'll wind up with a shade that's just right. You'll also avoid that dreaded demarcation along the jawline.
Apply Sparingly
Dab on six dime-size dots of foundation: two on your forehead, one each on the tip and along the sides of your nose, and the last on your chin. Using two fingers, spread the color over your forehead, down your nose, across your cheeks, over your chin, and along the sides of your face. Always blend down or sideways—never up—to prevent foundation from catching in peach fuzz.
Use Your Fingers
Blend the liquid toward the perimeter of your face. It will get sheerer as you move closer to your hairline and jaw, preventing any harsh lines.
Diffuse With a Sponge
Tap a clean, damp makeup sponge around the nose, over wrinkles, and anywhere your base is noticeable to remove excess that could crease or emphasize lines.
Hide Imperfections
With a fine-tipped brush, dab a solid concealer over blemishes or dark spots that are still visible.
Get rid of redness with a yellow-based foundation. Smooth it over any discoloration with your fingers, and then blur the edges with a damp makeup sponge.
Hide undereye circles with a creamy formula, tapping it on with your ring finger.
Powder Your Nose (And Your Cheeks, and Your Forehead...)
Be sure to use USDA Certified Organic Skin Care products before applying your makeup for best results.
What does a beauty blender and microwave have in common?
When law student Julianna Asouzu revealed it was possible to clean your beauty blender with a microwave, I for one was skeptical. But you know what, it actually works.
The blenders transformed with just a blitz in the household appliance, and yes, I'm just as shocked as you.
The 19-year-old student shared the video on Twitter telling people that she had attempted to clean her beauty blender in the microwave after seeing a video on Instagram.
She explained that she'd placed her dirty beauty blenders in a plastic cup of hot water and dishwashing liquid, which she then microwaved for one minute.
“Guys all my beauty blenders are clean. Before this they were all brown. I saw it on Insta,” she explained. “I basically put them all in this cup and I put them in the microwave for one minute and all this came out.” So, here's another tried and proved beauty hack.